Let’s face it, as bloggers, most days time is of the essence, but it is something that is in short supply. If you have a WordPress blog, I have a few tips on how you can save yourself some valuable and precious time.
Because, bloggers, couldn’t we all use some time-saving hacks?
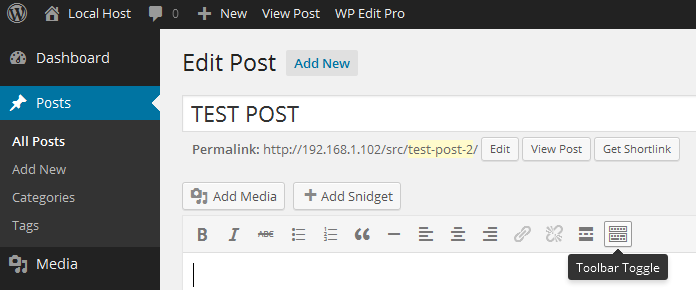
WORDPRESS TOOLBAR TOGGLE
Ever wonder how many bloggers seem to be able to change the size of their font, or underline a word, or even use different colors easily?
Well, this can be accomplished by simply expanding the WordPress Toolbar by using the WordPress Toolbar Toggle, which is a square button to the right of Proofread Writing button (ABC with a check underneath it).
Once you hit this button, you will expand the WordPress Toolbar to include changing the font style, underlining text, as well as allowing for varying font colors, too.
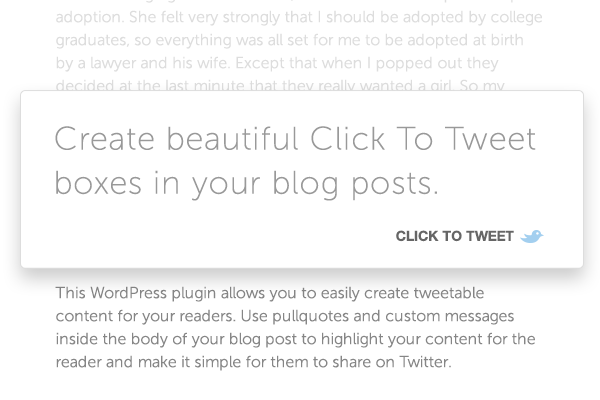
CLICK-TO-TWEET
Socially sharing on Twitter is huge for bloggers. And one such way to do this quite easily and effectively is to include a Click-to-Tweet button by using the WordPress plugin for this.
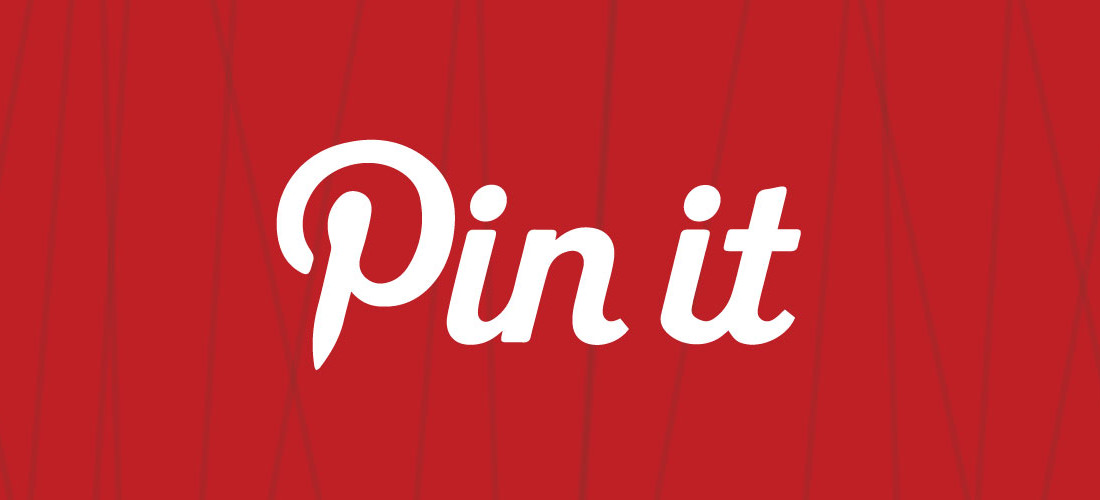
JQUERY PIN IT BUTTON
Another great way to share socially for bloggers is Pinterest. Yes, WordPress is capable of sharing easily on Pinterest at the top or bottom of your posts, but bloggers should also have captivating images.
The beautiful graphics that are pin-worthy, should be able to be pinned easily by hovering over it.
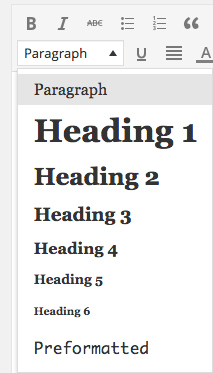
SWITCHING HEADING STYLES SIMPLY
As I shared in WordPress Hack #1 with the Toolbar Toggle, you can indeed change text heading styles to show that certain text may be more important than others.
In order to do so, once the Toolbar Toggle has been activated, you will find the Heading styles on it at the very far left-hand-side enabling you to switch between font and heading styles in the blink of an eye.
Take a look at the graphic below to see just how many different heading styles, you can choose from now.
LET WORDPRESS HELP FIND INTERNAL LINKS
A great way to lead readers back to older articles that are pertinent to what you are sharing in a current blog article is to link back to internal (older blog) links
The easy way to do this is to first click to insert a link on your toolbar. Once you do this click to expand, “Or link to existing content”, which can be found below, “Open link in a new window/tab”.
After you click to expand to take a further look at your “existing content”, you can then search from older articles of the topic of your choice to indeed link back to easily and efficiently.

INSERT AN EM DASH
Years back, I worked in the editorial department of a well-known publishing house.
I will never forget how I learned on an old PC desktop how to add something called an Em Dash, which is a fancy enlarged hyphen used to create a strong break in the structure of a sentence.
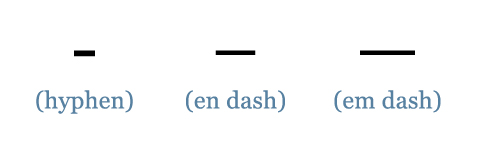
But how can this be accomplished quickly when blogging on WordPress?
Simply just type three dashes in a row or “---".
WordPress automatically converts this into an em dash when the post is published. But note that it’ll still always appear as three dashes in your editor.
USE QUICK EDIT
Have you ever wanted to edit something about a post, such as the category the post is in or the title, but don’t want to have to go into the entire post edit mode to do this?
Well, you can quickly edit an article without indeed ever having to enter the post edit mode by hovering over the title of the post you want to edit, and then you will see a list of links appear below the title. These include a “Quick Edit” option.
![]()
“Quick Edit” saves you time to get to the actual post editor, and lets you make these fast edits:
- Change the title
- Change the permalink
- Change the publish date
- Set post to password-protected or private
- Edit the categories
- Edit the tags
- Turn comments and pings backs on/off
- Change the status of the post
- Make the post sticky
Basically, you can do anything except make edits to the body of your post.
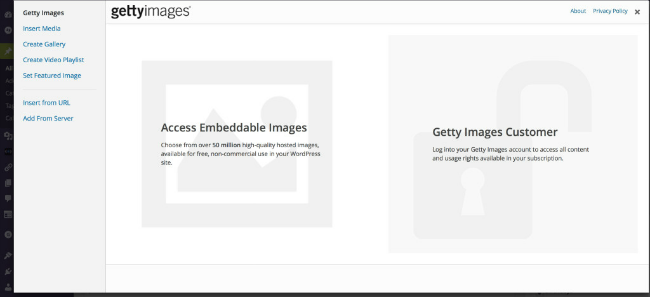
GETTY IMAGES
Ever get stumped on finding images or want to use an image that you normally don’t have permission to use? Or maybe you simply just can’t afford to purchase an image through stock photography, but still wish you can use something specific for an article?
Well, now you can use the extensive Getty Images library right through your post editor, where you normally upload your images.
Getty images allow this by uploading their WordPress plugin FREE.
You heard me correctly, you can upload pretty much any Getty stock image for FREE right in your WordPress post editor once you upload the Getty WordPress Plugin.
DROP IMAGES RIGHT INTO YOUR POST (DRAGGING THEM IN)
Sometimes you may just not feel like having to take the extra step when uploading your own images from your computer.
For times like these, you can simply drag any image on your desktop right into your WordPress blog article without ever having to actually open up your “Add Media” icon in your post.
Pretty nifty and helpful, too!
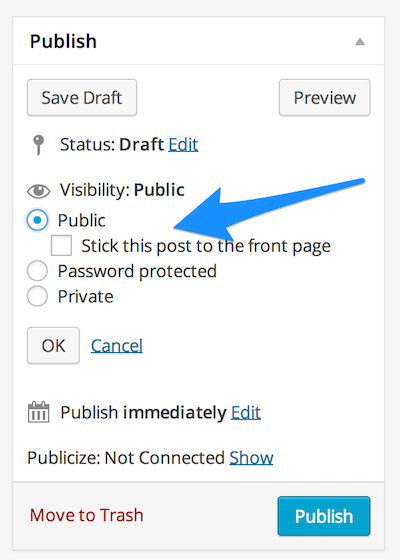
STICKY ANNOUNCEMENT (TOP OF BLOG)
Ever wish that you leave an announcement at the top of your blog even after you publish new blog articles?
Well, you can totally do this by using a simple setting inside the post editor. When you are in the Publish module, click on the “Edit” link next to “Visibility: Public.”
Then you just have to check the box to “Stick this post to the front page.”
When you want to get rid of the announcement after some time, all you have to do is uncheck the original box to place the post back into chronological order.