
I’ve got some good news and some bad news.
The bad news is that WordPress alone isn’t going to help you rank in Google. It’s just a tool.
The good news is that WordPress makes it dead simple to use SEO best practices. So even if you’re a beginner to SEO, you can optimize your website for higher Google rankings with ease.
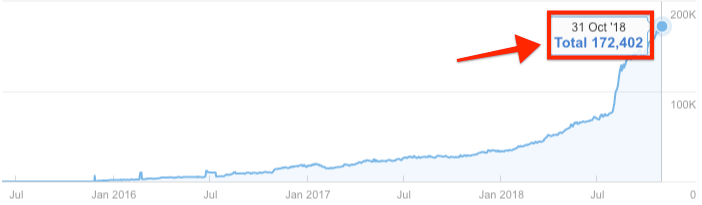
How do we know? This very blog runs on WordPress and gets over 170K organic visits every single month.
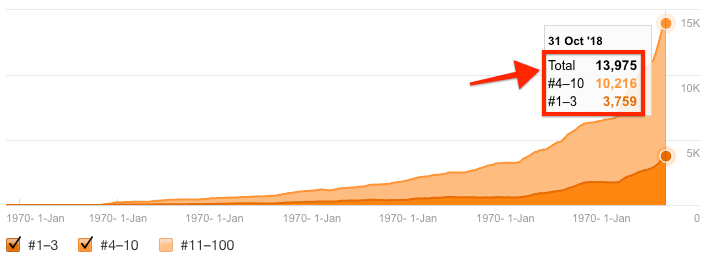
It also ranks on the first page of Google for nearly 14K keywords:
In this guide, you’ll learn exactly how to optimize your WordPress website from start to finish.
What is WordPress? (WP ≠ SEO panacea)
WordPress is an open-source Content Management System (CMS). It provides a way to structure, manage and publish websites even if you don’t know HTML.
Blogging tends to be what springs to mind when most people think of WordPress. But it’s not only used for blogs. WordPress powers 32% of the internet.
Here are a few well-known companies that run their websites on WordPress:
- TechCrunch;
- BBC America;
- The Walt Disney Company;
- Mercedes Benz
Use isitwp.com to check whether WordPress powers any website.

Do you think those companies would use WordPress if it were bad for SEO? I doubt it.
That’s likely why WordPress states that their CMS is SEO-friendly on their homepage…
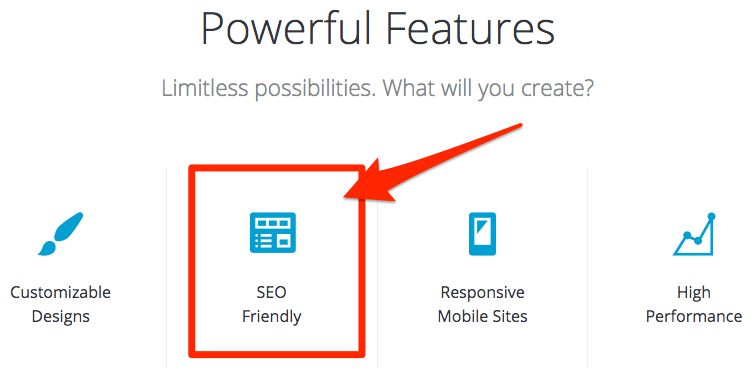
… but what does that actually mean?
It does mean that WordPress takes care of the most basic SEO best practices out of the box. Its popularity means there are tons of SEO plugins available—many of them for free.
It doesn’t mean that installing WordPress equates to a perfectly-optimized website and that no other SEO tweaks are required.
WordPress is a tool that makes using traditional SEO techniques and strategies easy. Nothing more, nothing less.
For that reason, WordPress SEO is no different from regular search engine optimization. So the focus of this guide is to teach you how to employ traditional on-page and technical SEO best practices within WordPress.
Off-page SEO strategies like link building are the same whether you use WordPress or not.
Getting started…
You’ve installed WordPress. Your website is live. Now what?
Start by installing these three free plugins:
- Yoast SEO;
- W3 Total Cache;
- Smush Image Compression and Optimisation
Not sure how to do that?
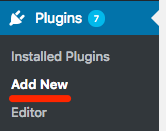
Log into your WP backend. On the sidebar, hit Plugins > Add new.
Search for the plugin you want. Hit “Install now.”
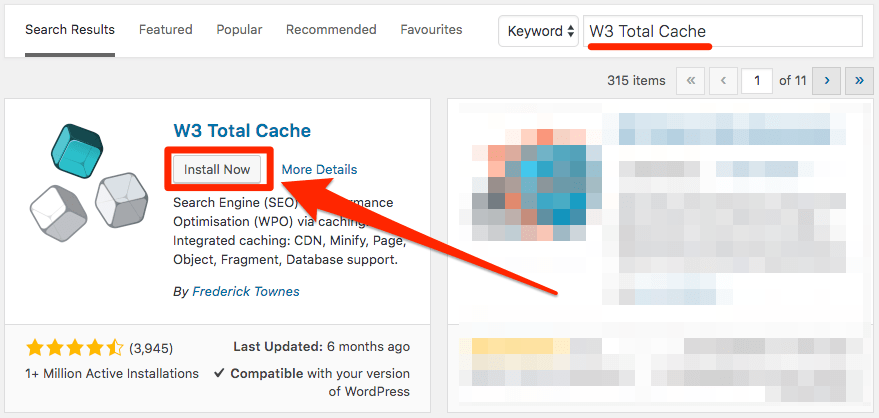
IMPORTANT. Don’t activate the plugins yet. We’ll do that as we go through this guide.
1. Install an SEO-friendly theme
WordPress usually defaults to an ugly theme when first installed.
The good news is that there’s no shortage of better-looking WordPress themes. The bad news is that many of them are about as SEO-friendly as a waiter having a bad day at work.
So what makes for an SEO-friendly WordPress theme?
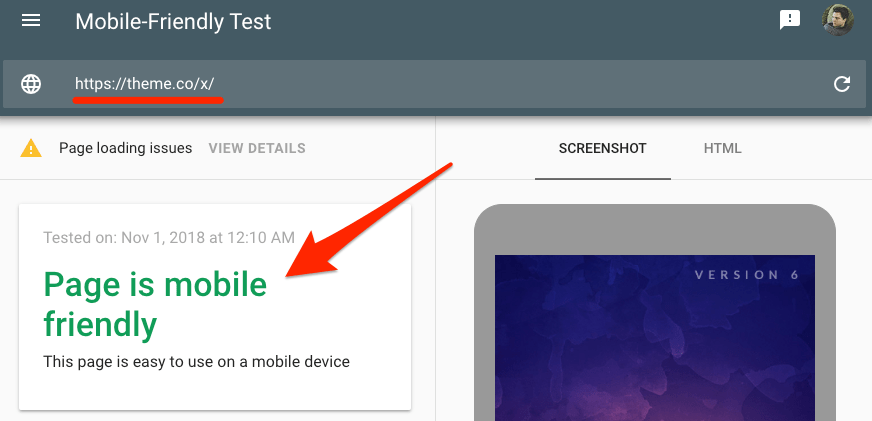
- Responsive design: Mobile-friendly content may perform better for those who are searching on mobile. Those are Google’s words, not mine.
- Lightweight: Avoid themes bloated with third-party plugins and scripts that you don’t need. They’ll slow your website down.
Most theme descriptions will tell you whether they’re responsive and mobile-friendly. But to be sure, run the theme demo through Google’s Mobile-friendly Test tool.
It’s a similar story with third-party plugins and scripts. Most theme sellers like to brag about these in their theme description. But it’s still worth running the live demo through Google’s PageSpeed Insights tool to check that it loads fast.
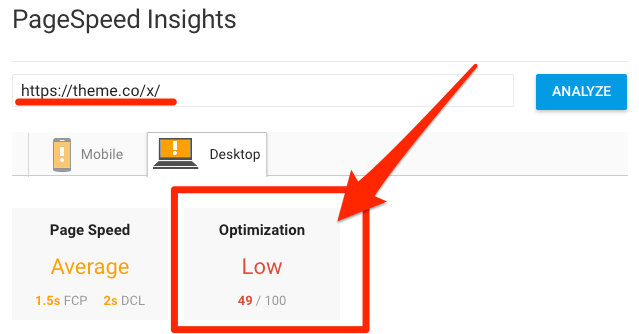
Do keep in mind that there are other factors (e.g., hosting, server location, etc.) that have an effect on page speed. Take these numbers with a pinch of salt.
2. Choose www vs. non-www
Have you ever noticed that some websites live at www.domain.com (www) whereas others live at domain.com? (non-www)
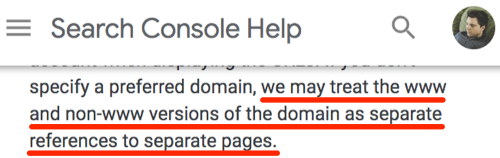
Google views the www and non-www versions of the same URL as separate references to separate pages.
So choose a preferred version and set it as the WordPress Address URL and Site Address URL in your WP backend.
You can find those options under Settings > General.
WordPress will automatically redirect the other version to your preferred one.
Does it make any difference which version you choose? For new websites, not at all. It comes down to personal preference.
But if your site is currently accessible at both the www and non-www URLs (type them into your browser to check for redirects), then you should choose the version that Google seems to prefer already.
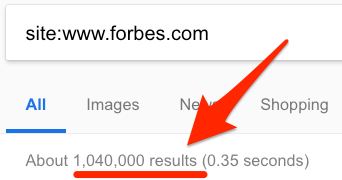
You can check this in Google.
Search for site:www.yourdomain.com. Look at the number of results.
Then do the same for the version without the www. That’s site:yourdomain.com -inurl:www.
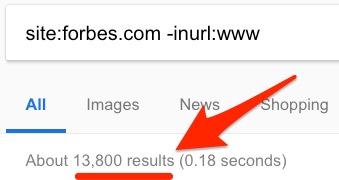
Whichever version returns the most results should be set as the preferred version.
This time, the www version is a clear winner.
3. Set up permalinks
You can choose the type of URLs WordPress uses in Settings > Permalinks.
Permalink = permanent link. Smart.
You’ll see a few options such as Plain, Post name, Numeric, etc.
Post name is the most SEO-friendly option for most websites because:
- It gives people a sense of what the page is about from the URL alone. That may increase your click-through rate in the SERPs which leads to more organic traffic.
- It increases the likeliness of you getting keyword-rich backlinks. That’s links with your target keywords in the anchor text. You’ll need to use your keywords in the URL for this to happen.
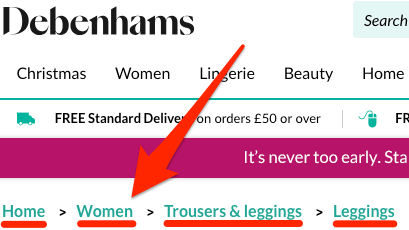
4. Enable breadcrumbs
Breadcrumbs give visitors (and search engines) a clear trail to follow around your site. They look like this:
You don’t have to use them. But the benefits of doing so are as follows:
- They help search engines understand the structure and hierarchy of your site;
- They create a good internal linking structure;
- They’re helpful to users;
- They appear in Google search results.
Here’s what I mean by that last point: Your pages will look like this in Google…

… instead of this:

Whether that’s useful is debatable. I’d argue that they look a bit nicer and provide more context. So they may increase your click-through rate, which is never a bad thing.
Yoast makes it easy to enable breadcrumbs in WordPress. What is Yoast? It’s an SEO plugin that handles a lot of basic WordPress SEO stuff automatically. But it does require some customization—the enabling of breadcrumbs, for one.
So activate the plugin (Plugins > Yoast > Activate) and hit the SEO menu item on the left sidebar. Then go to:
Search appearance > Breadcrumbs > Enable breadcrumbs
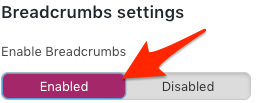
That’s it. Done.
It’s worth noting that your WordPress theme must support breadcrumbs for this to work. Not all do. If you want to use breadcrumbs and your theme doesn’t support them, use your loaf and hire a freelancer to fix it for you.
5. Enable manual approval of comments
Most blog comments are innocent enough. Usually, it’ll be people asking legitimate questions or saying how much they enjoyed your post.
But be aware: Blog comment spam is a thing. A big thing.
This is what it looks like:
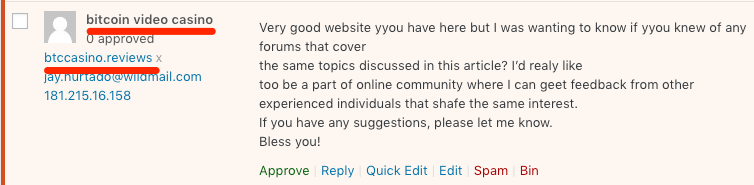
Confused? Here’s the deal:
Spammers use automated software to post comments to hundreds or thousands of blogs. They do this to build backlinks to their website at scale.
You see, when someone submits a blog comment, WordPress also asks for their name and website. Then, when the comment goes live, their name gets linked to their site.
Google introduced the “nofollow” tag in early-2005 to combat this issue. Now, WordPress comments are “nofollowed” by default, so they don’t transfer PageRank.
But according to Google, spammy comments can still have an adverse effect on SEO because:
- Low-quality content on some parts of a website can impact the whole site’s rankings.
- Spam can distract and annoy your users and lower the reputation of your site.
- They might remove or demote pages overrun with user-generated spam to protect the quality of their search results.
In WordPress, automatic approval of comments is on by default. So you should turn it off and vet all comments by hand.
To do this, go to Settings > Discussion. Tick the “Comment must be manually approved” checkbox.
![]()
You can use plugins like Akismet to help with comment spam. Still, unless you have a huge site, manual vetting and approval is the way to go.
6. Set custom URLs (for posts & pages)
Pop quiz.
You publish a post on your WordPress blog entitled: “The 20 Best Protein Powders for Men to Buy in 2018 (Updated Sept. 2018)”
What will WordPress set the URL to by default?
- domain.com/blog/p?67459376
- domain.com/blog/best-protein-powder/
- domain.com/blog/the-20-best-protein-powders-for-men-to-buy-in-2018-updated-sept-2018
Click the GIF to reveal the answer:

There’s nothing wrong with that URL per se. But it is a little on the long side, meaning that Google may truncate it in the search results.

Does that have a direct affect on SEO? It’s unlikely.
But truncated URLs may have an indirect effect because they look ugly and unenticing. That may hurt your click-through rate and lead to fewer organic visits.
Luckily, WordPress makes it easy to customize your URLs. Just hit the “Edit” button next to any page or post’s current permalink.
My advice is to use your primary target keyword and replace the spaces with dashes. So, in this case, our URL would be: domain.com/blog/best-protein-powder/
7. Use the WYSIWYG editor for post/page formatting
Here’s what Google says about content formatting:
It’s always beneficial to organize your content so that visitors have a good sense of where one content topic begins and another ends. Breaking your content up into logical chunks or divisions helps users find the content they want faster.
In other words, don’t publish a giant wall of text. Break things up with HTML formatting.
How can you do that?
- Create a clear hierarchy with H‑tags (e.g., H2, H3, etc.);
- Use unordered and ordered lists (where appropriate);
- Draw attention to important copy (bold, italicize, underline, etc.)
That’s SEO 101. But how do you do those things in WordPress?
Use the WYSIWYG editor.
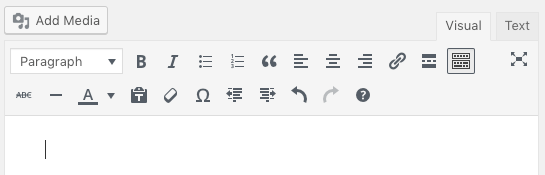
This is the WordPress WYSIWYG editor.
You’ll see this when adding a new post or page.
It’s pretty self-explanatory—especially if you’re familiar with Microsoft Word or Google Docs.
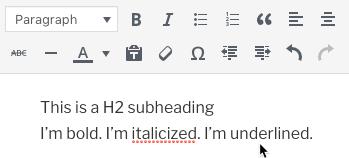
Just be sure to paste only plain text copy into the visual editor. To do that on Mac, hit CMD+Shift+V. On Windows, it’s CTRL+Shift+V.
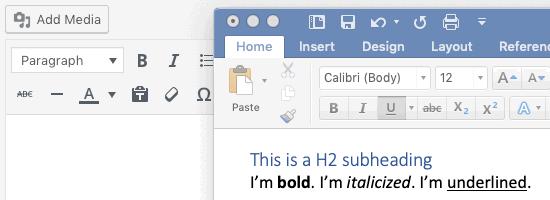
That will remove all formatting added by your word processor. You’ll end up with a lot of useless messy HTML if you don’t do that.
You can then use the WYSIWYG editor to add back your desired formatting.
8. Use alt text for your images
Did you know that 8.1 MILLION (3.3%) Americans have a vision impairment and may use screen readers?
That’s a lot of people, and it’s one reason why it’s so important to use image alt tags. Those using screen readers won’t see your images—they’ll only see the alt text.
Here’s the syntax for alt tags:
<img src=”/cute-cat.png” alt=”A picture of a super cute cat.”/>
That said, as you’re using WordPress, that syntax is semi-irrelevant. You can add alt text to images via the visual editor.
Hit Add Media > Upload files.
Fill in the alt text field with a short description of your image. Keep it simple and accurate. Don’t try to shoehorn your target keywords in there.
Here’s an example alt tag for a photo of Tim Soulo:
![]()
But this is about more than just catering to the visually-impaired. Alt tags provide Google with greater context for the images on your page. This can help boost rankings in Google Images according to John Mueller.
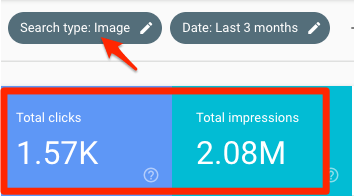
Is ranking in Google Images pointless? Not at all.
We’ve had more than 2 MILLION impressions in Google Images over the past three months. That resulted in 1,570 visits to our website.
Make sure to use descriptive filenames for your images too. “IMG865729” isn’t going to cut it.
9. Internally link to other posts/pages
Internal links point to other pages and posts on your website.
Here are two reasons why they’re important for SEO:
- They aid the flow of PageRank around your site;
- They direct visitors towards more of your top-notch content.
You can add internal links to posts and pages in WordPress using the WYSIWYG editor.
Highlight the text that should form the link, then hit the “Insert/edit link” button. Paste in the URL of another page or post on your website.
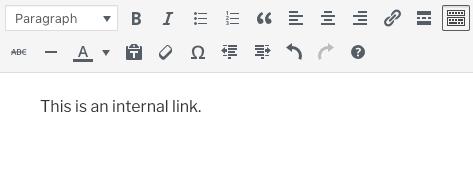
That’s that.
Next, go to the Data Explorer. Add these custom filters.
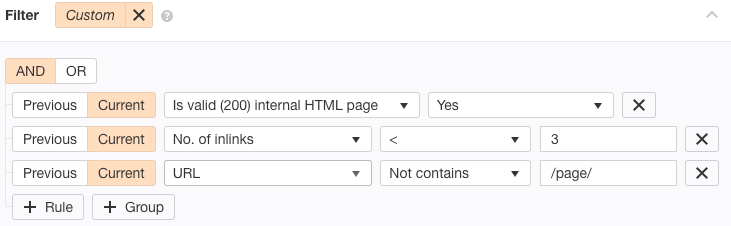
You’ll then see all working posts and pages that a) aren’t a part of the page archive, and b) have fewer than three internal links.
Sort the results by organic traffic in descending order.
You now have a list of pages that could use a boost.
Next, search your WordPress backend for a keyword related to one of those pages. You will then see all posts mentioning that keyword in the search results.
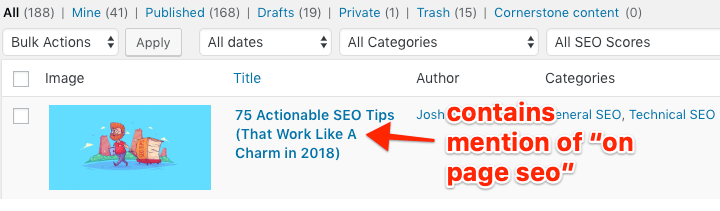
Those are perfect places from which to add internal links.
Does your WordPress theme use a sidebar?
Consider adding a “popular articles” widget and linking to the pages or posts that:
- You’ve found to convert particularly well; or:
- You want to rank higher in Google.
Brian Dean does this on his blog:
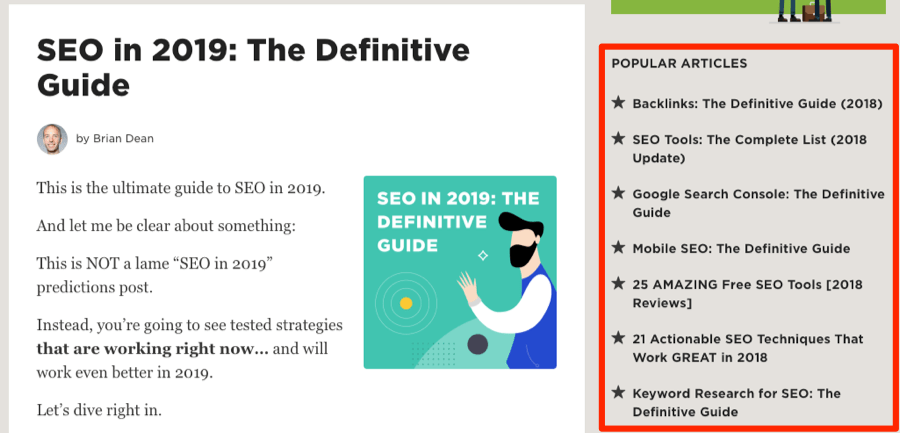
Note. If you’re not familiar with basic HTML and WordPress widgets, you may need a developer to help with this.
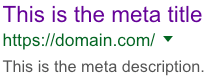
10. Set unique, “optimized” title tags and descriptions
Meta titles and descriptions are what you see in the search results.
Google doesn’t always show the title and meta description that the site owner sets. Sometimes they are automatically rewritten.
SEO best practice is to customize them for every page and post.
Here are the rules:
- Make them enticing: A higher click-through rate leads to more traffic from search engines.
- Keep them short: Google starts truncating titles at 590px (~50–60 characters). Meta descriptions get truncated after about 930px (~155 characters). Use this tool to preview them before setting them live.
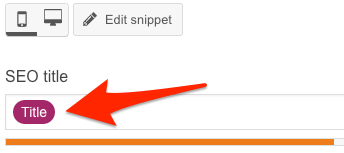
Yoast lets you set custom titles and descriptions on a page-by-page basis. Just scroll to the bottom of the post or page you’re editing.
That’s where you can write your title and meta description.
By default, Yoast sets this to a variable which pulls the title of the post and uses that for the meta title too.
That usually works fine. But not always.
For example, we have a post entitled “I Just Deleted Your Outreach Email Without Reading. And NO, I Don’t Feel Sorry. (Evergreen)”
That’s too long.

So it’s always better to paste tried and tested plain text titles and descriptions here.
11. Nest pages in subfolders (where appropriate)
Provided that you set your permalink structure to post name, then both your page and post URLs should look like this:
domain.com/post-name
domain.com/page-name
But with pages, you can create them with different levels, using subfolders.
So let’s say that you’re a digital marketing agency using WordPress and you have five different services. You sell SEO, PPC, Social Media Marketing, PR and Email Marketing.
Here’s the best way to structure that:
- Create a “Services” landing page where you talk about the five different services you provide.
- Create individual pages for each service you offer.
- Link to each of those individual service pages from your main “Services” page.
Here’s what your URL structure will look like by default:
domain.com/services/
domain.com/seo/
domain.com/ppc
domain.com/social-media-marketing/
domain.com/email-marketing/
Not bad. But it would be better to nest the individual service pages under the “/services/” subfolder. Like this:
domain.com/services/
domain.com/services/seo/
domain.com/services/ppc
domain.com/services/social-media-marketing/
domain.com/services/email-marketing/
That’s easy to do in WordPress. Just use the Parent dropdown on the page editor and choose the “Services page.”
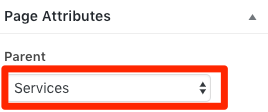
Now the URL is accessible at domain.com/services/SERVICE/.
12. Enable content caching
Caching is a fancy word, isn’t it?
Here’s what it means in a nutshell:
You create static versions of your posts and pages. Browsers can then load them fast. Your website is quick. Users are happy. Simple!
Google loves happy users. And they love fast-loading sites. They’ve even confirmed that page speed is a ranking factor on both desktop and mobile.
There are tons of caching plugins available for WordPress, one of which is W3 Total Cache. You should have installed this earlier.
Activate it, then hit Performance > General settings on the left sidebar.
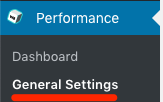
There are a lot of complex settings here. Let’s keep this simple and tick enable on Page Cache, Minify, and Browser Cache.
That should be a good starting point for most sites.
13. Compress and optimize your images
The average web page is 3MB.
But long-form blog posts tend to be much bigger because they contain lots of images. For example, here’s the total size of our local SEO guide according to GTmetrix:
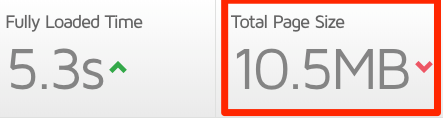
Given that the average global mobile download speed is 20 Mbps, this page would take 4.2 seconds to load. According to Google, 53% of mobile site visitors leave a page that fails to load within three seconds.
That’s why it pays to optimize the slowest part of your web pages—images.
Start by activating the Smush Image Compression and Optimization plugin. You should have installed that earlier. That will compress and optimize all images that you upload in future. No need to lift a finger.
To compress the images you’ve already uploaded, hit the Smush menu item on the left sidebar and hit “Bulk smush now.”
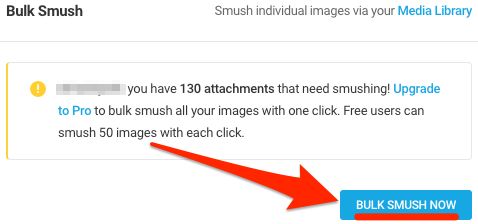
This will optimize all existing images on your site in batches of 50. You’ll then have to re-click the button to optimize the next 50, and so on. That can be annoying for large sites. So you may want to upgrade to pro if you have a lot of images.
Next, turn on Image resizing.
You’ll then want to change the “max width” dimension to match your WordPress theme. Set it to the widest resolution that images get displayed on your site. For us, that’s 900px.

Pay particular attention to the slowest loading pages on your site. Those may need some manual optimization (e.g., removal of unnecessary images)
You can find those in Site Audit > Performance > Slow page.
Here’s another tip: Sort the list by organic traffic in descending order.
Focus on optimizing the pages with the most organic traffic first. Those are the pages that must already rank well for high-volume search terms.
We know that page speed is a ranking factor. So improving the speed of these pages may be all that’s needed to bump you up from position #2 to #1 for a high-volume term. That will result in way more traffic. ?
14. ‘Noindex’ low-value content
Take a look at this web page:
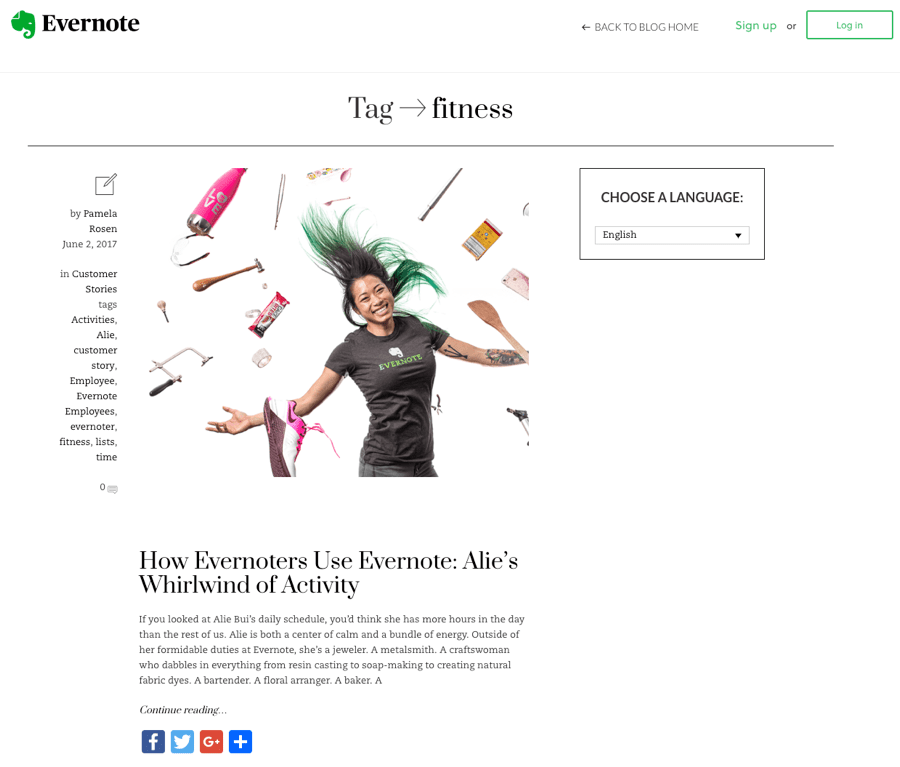
It lists all the posts on the Evernote blog with the “fitness” tag—of which there’s currently only one.
Pages like this can be useful for folks that are already on your site and want to find posts related to a particular topic. But you wouldn’t want them to pop up in Google’s search results. They tend to be thin and provide little to no value for search engine users.
It’s the same for media and post format pages too—their value is minimal.
Here’s what Google says about thin content and content quality:
[You should] try to find a way to analyze the quality of your content and to make sure that the high-quality content is indexed, and that the lower-quality content doesn’t get indexed by default.
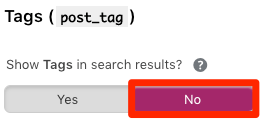
Yoast sets “post format” and “media” pages to “noindex” by default. You’ll need to change the settings for tags pages. To do that, go to:
SEO > Search appearance > Taxonomies
Switch the “Show Tags in search results?” option to “No.”
15. Fix duplicate content
Look at these two pages:

Do you see a difference in the content? I don’t, because there is no difference. These are two separate pages at different URLs, yet the content is identical.
SEOs call that duplicate content… and it ain’t good.
This is a common issue with ecommerce sites.
You can fix such issues in two ways: noindex or canonicalize the duplicate version(s).
Noindexing a page leads to its removal from search engine indexes. You should do that if the duplicate page provides no value to visitors. It may also make sense to “noindex” near-duplicate landing pages that you’re split-testing.
Canonicalizing means to specify a preferred version of a web page. Search engines tend only to index this preferred canonical page. Duplicate or near-duplicate pages should always have a canonical set if not “noindexed.”
Yoast can implement both options on a page-by-page basis. Hit the cog icon on the Yoast settings when editing a page or post. You’ll see something like this:

Select “No” from the top drop-down to “noindex” a page or post. Or paste the URL of the preferred version into the “Canonical URL” box to canonicalize. Easy peasy.

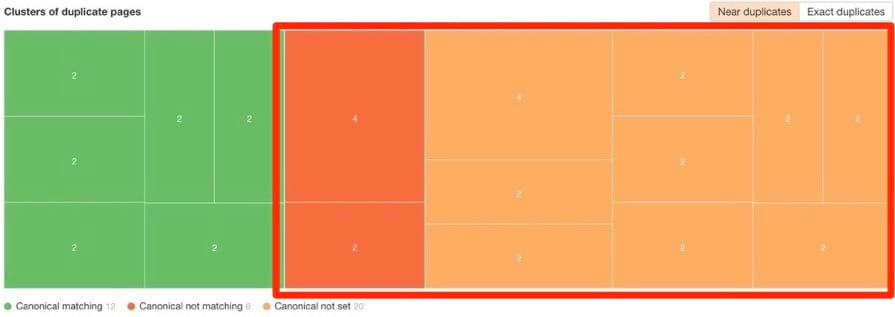
You should also check for near-duplicates where the canonical is not set or not matching. These are the red and orange clusters in this same report.
Final thoughts
WordPress is the most popular CMS on the planet for good reason.
It’s easy-to-use, flexible and provides a good base for SEO. But WordPress isn’t fully-optimized out of the box. You need to install a few plugins and make a few tweaks to get the most out of it.