
People on the web don’t have much time to consume data – because there’s so much of the latter. There’s so much data that we simply don’t have the time to read it all! As a content curator for the modern web, your task is to maximize throughput. The more you express with lesser words, the better you are at your job.
Why are Images (so very) Important?
There are many, many reasons why your would (and should) use images in your posts and articles:
- Images serve as visual stimuli for a call-to-action (CTA). A CTA can be any task you want your visitor to perform. Common CTAs include subscribing to your newsletter, sharing your article over social media or buying your product.
- Images enhance the connection the writer seeks to establish with the reader.
- Images convey more through less.
It is therefore, quintessentially important that we use the right images in our presentations (blog post, informal report, actual PowerPoint presentation etc.) in order to leave a mark in the reader mind!
But wait! There’s a problem!
Images take up around 63% of the bandwidth used by modern websites, so it is increasingly important that they are properly optimized for speed.
A one second delay in page load times could reduce conversion rates by 7%
We’ve established that people have a short attention span (one of the downsides of the modern content production rate). Even if you use the right images, if they do not load within the acceptable timeframe, the interest is lost.
10 Most Common Image Optimization Errors
The majority of sites have a problem – they use excellent images, but the way the image is served to the visitor is poor. Large size, poor optimization, incorrect format, unnecessarily large dimensions (sizes), unresponsive images and careless SEO errors, are some of the most common problems the modern web faces. In today’s article, we’re going to address these issues!
1. Large Dimensions
This one’s a classic. Suppose you need a 150×150 pixel photo in your site’s “Team” page. Usually, you’ll use a 5MP headshot, edit it a bit and finally upload it.
Did you spot the problem? Some folks directly upload the actual 5MP image! The WordPress theme will load the entire 5MP image (that’s 5 x 10^6 pixels) and ask the browser to shrink it to the required dimension of 150x150px. In essence, the browser displays only 0.0045% of the original image!
You end up wasting both your and your visitor’s bandwidth (even if you’re serving the image via a Content Delivery Network like Stackpath CDN), consuming more hard disk space and increasing the load time. None of the features are something you’d want in your site.
Always resize (and by resize I mean downsize) the image to the required dimensions and then upload it!
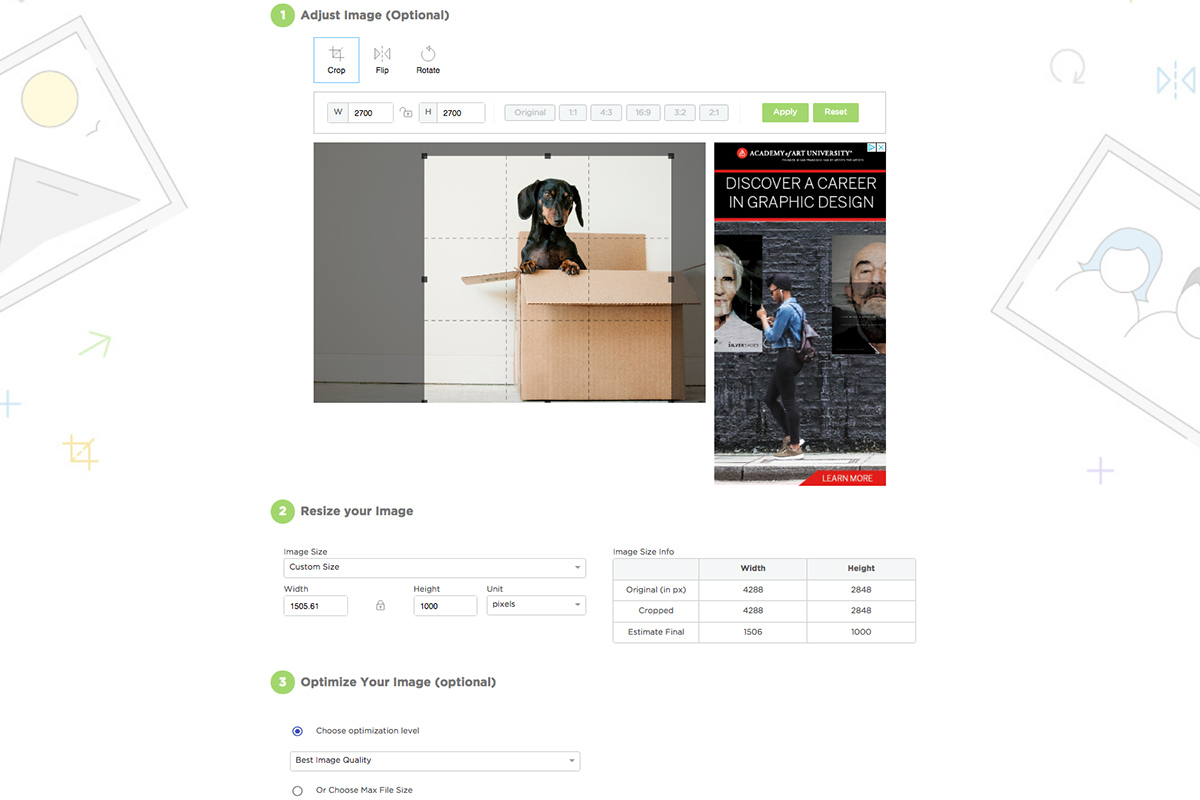
You don’t need fancy software to do this – there are free online tools like ImageResize.org you can use to quickly resize and optimize your images. Just upload and tweak your photo settings. When you’re done download your optimized image to use on your site. They also offer a quick Image Compressor if you just want to cut down on file size.
Helpful Tools:
- IrfanView is an excellent freeware to batch-resize your images with advanced options like optimization, watermark and borders.
- ImageMagick is an advanced open-source tool which can be used in a variety of programming languages and operating systems. You can write your own app or simply use it via the command line.
- ImageOptim (Mac) allows you to drag whole folders and quickly optimize multiple images.
- TinyPNG is an online image compression tool with an API.
2. Incorrect Image Format
The format used for the image plays a vital role. As a general rule of thumb, use PNG for vector graphics and computer-generated images such as clip art etc. Use JPEG for photographs or images with a variety of colours. For a detailed explanation, check out this awesome StackOverflow answer.
3. Not using Progressive JPEGs

Baseline (Normal) JPG versus Progressive JPG
For the common man, JPEGs are of two types – Baseline and Progressive. Visually, both are same. The difference lies in the way they’re loaded:
- Baseline JPEG has only one layer – containing the whole image. When requested, the entire image is loaded at one go.
- Progressive JPEGs compose the image with multiple layers. A Progressive JPEG image is loaded layer by layer, which gradually increases in quality, ultimately giving you a lossless view.
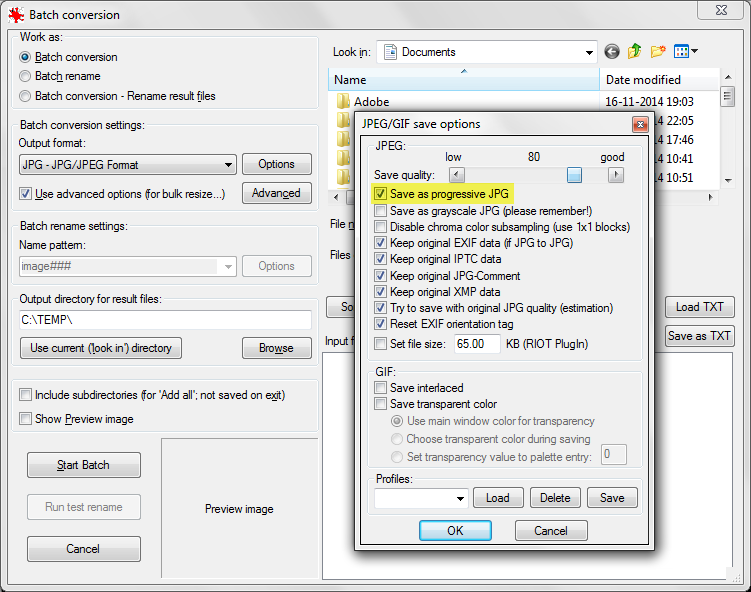
IrfanView Supports Batch Conversion with Progressive JPEG
All major image resizers allow you to save images as Progressive JPEG.
4. Not using Lazy Load

Lazy-Loading is an excellent resource saving technique where an image is loaded only when the visitor scrolls down to the view-frame of the image. Consider an article – “15 of the Most Fuel-Efficient Cars in 2014”. Naturally, this article will contain at least 15 images. And no matter the height of the display device – monitor, tablet, or smartphone, you cannot fit all 15 images in the view-frame. You must scroll down to view all the images.
With Lazy Loading enabled, images will be loaded only when a visitor is in the vicinity of the image. In other terms, the images start to load just when you scroll down to view it. The first few images, however, are loaded instantaneously, since you’re already in the view-frame. Lazy Loading saves bandwidth at both ends and improves load time! You can use Lazy Loading in WordPress with the BJ Lazy Load Plugin.
5. Not using a CDN
Using a Content Delivery Network (CDN) will serve the image from a server which is physically closest to the visitor’s location. If a visitor from India requests an image, and the CDN has a POP (point of presence, or simply a server) in Tokyo and New York, the image will be served from the server located in Tokyo.
When you have considerable traffic, you should setup a CDN with WordPress in order to lower your load time and gain overall performance.
6. Not declaring the ‘alt’ Attribute
The ‘alt’ attribute describes the image for the search engine. The text you enter in this field will be displayed to the user in case the image cannot be loaded. A lot of people tend to leave these fields blank. This is very detrimental for SEO, and you lose out on traffic. You should always try to include your site’s keywords in your images’ alt tag.
7. Not Optimizing Images
Optimized images are 40% lighter than normal images. This improves load-time and saves bandwidth. From Freddy’s list of the Best WordPress Image Optimization Plugins, we would recommend WPSmush.it to optimize your images. Kraken.io is also a great online option for compressing images in a jiffy.
8. Responsive Images
Even if your site is responsive, doesn’t mean your images are. That means the header image you use for a 22” desktop screen is also served to a 5” iPhone. When you upload an image, WordPress resizes it into multiple versions – Thumbnail, Medium, Full Size, etc. This can be changed by the developer. A well coded theme will serve the “Medium” sized version of the image, thereby saving bandwidth.
The Picturefill.WP plugin will replace image tags with a new <picture> element that would serve different images based on media queries. It’s fairly experimental (that means there are bugs) and shouldn’t be used on a live site.
9. Image Captions
Captions aren’t always necessary, although in some cases, it is required – such as screenshots in a tutorial. Captioning images helps readers understand the topic better, while boosting your SEO.
10. Image Filename
Think about the filename from a search engine’s point of view. Use the same text as you would in the ‘title’ tag of the image. Also, try to include your keywords that are most relevant to your site.
Conclusion
Image SEO is critically important for any website – old or new. Folks who implement image SEO properly (it can be quite mundane at times), stand to gain a significant amount of organic traffic (the best kind of traffic) in the long run.