Creating and sending invoices is an essential yet cumbersome task for most freelancers and small businesses. Instead of manually creating an invoice using a template, you can save a lot of time using the right tools. In this article, we will show you how to create invoices for clients using WordPress.
Even though there is a WordPress plugin for invoices, we recommend using a more intuitive solution called Freshbooks. This is why we will be sharing two methods for creating invoices. FreshBooks and WP-Invoice.
Method 1: Using Freshbooks
The easiest and most professional accounting tool for freelancers and professionals is Freshbooks. It’s an accounting tool designed for non-accountants, and it is perfect for WordPress professionals.
There is a free 30-day trial for any paid feature, and they even have a forever free plan.
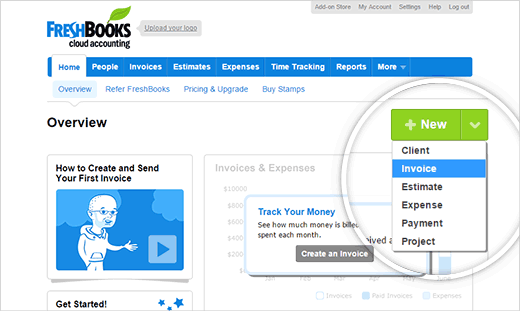
Signing up is extremely easy, and you don’t even need to enter your credit card details for the trial. Upon registration, you will land on a simple dashboard that looks like this:

Creating Your First Invoice in Freshbooks
Creating and sending invoices with Freshbooks is a breeze. Simply click on the New button and select Invoice from the dropdown menu.
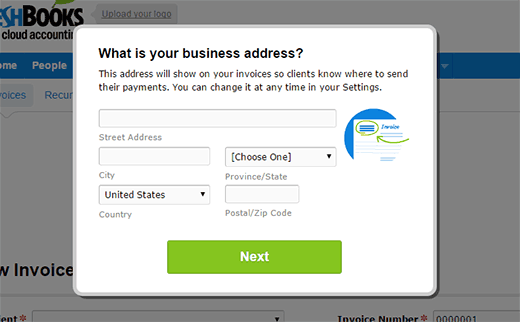
If you have not added your business address, then Freshbooks will ask for your business address which will appear on your invoice.
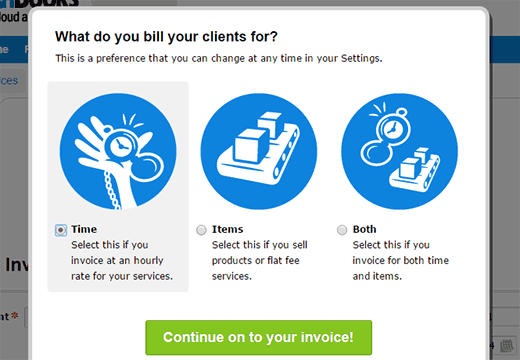
The invoice wizard will also ask what do you bill your clients for? You can choose time, items, or both depending on what services or products you provide to your clients.
On the next screen, you will need to provide client information. Freshbooks will save this information, and you can use it later whenever you need to send an invoice to that client.
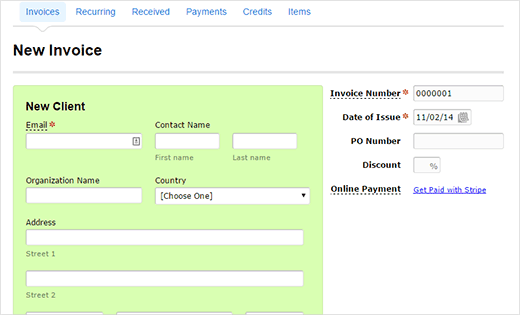
After saving your client details, you can scroll down to enter the tasks and items, rates, and amount due. You can add multiple lines for each item or task along with additional notes, terms and conditions.
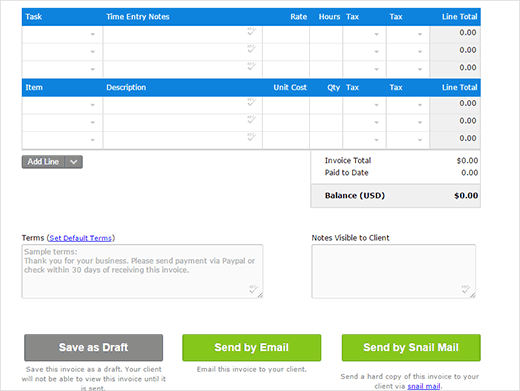
Once you are satisfied with the invoice, you can save it as a draft, or send it instantly via email. You can also send an invoice via snail mail.
That was simple, wasn’t it?
Adding Payment Methods in FreshBooks
Freshbooks allows you to accept online payments from clients. It supports PayPal and Stripe by default, and you can enable other popular payment gateways. If you need to setup payments, then you need to click on the Settings on the top menu and click Accept Credit Cards tab.
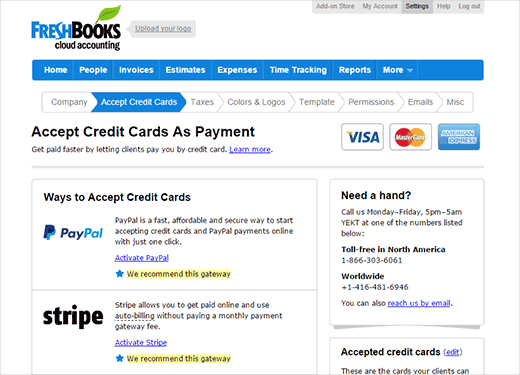
Activate the payment method you want to use and answer some simple questions for your account details. That’s all, your clients can now pay you online when they receive an invoice from you.
Tracking Time and Expenses with FreshBooks
FreshBooks allow you to manage and track your expenses. Simply click on the expenses tab to get started.
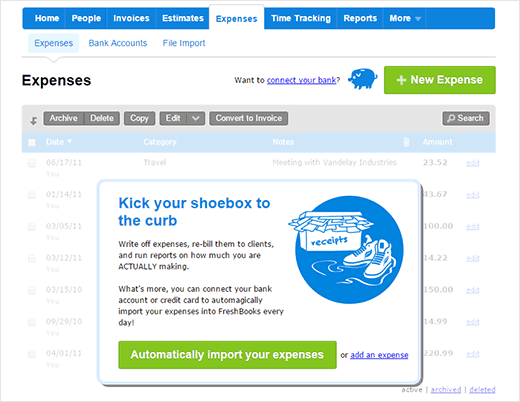
Freshbooks can import your expenses from more than 13000 financial institutions. You can easily connect it to your bank account and credit cards. You can also manually add expenses, and save receipts by simply taking a snapshot from your phone.
If you are working on hourly basis, then every second of your work should be billed to client. Freshbooks comes with built-in time tracking tool. Simply click on Time Tracking tab to get started.
![]()
All you need to do is enter the project details and log your hours. You can also launch the time tracker by clicking on the Start Timer button.
Method 2: Using a WordPress Plugin
Another way to handle invoices is by using the WP-Invoice plugin. This way your WordPress website becomes the hub of your invoices and payments.
First thing you need to do is install and activate the WP-Invoice plugin. Upon activation, the plugin will add a new ‘Invoice’ menu item in your WordPress admin. You need to visit Invoice » Settings to configure the plugin.
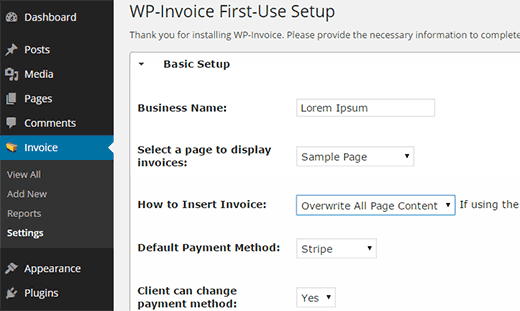
First you need to enter your business name as you want it to appear on the invoices. Next, you need to select a page to display invoices. We recommend you to create a new WordPress page titled Invoices and select that page here. This page will be used to display your invoices.
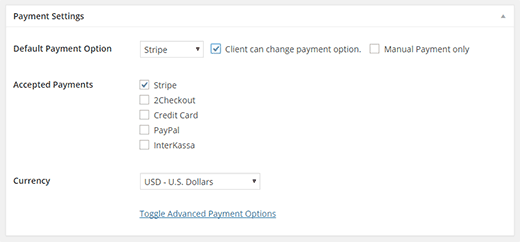
WP-Invoices comes with multiple payment options to collect payments in WordPress. You need to choose a default payment system from Stripe, 2CheckOut, PayPal, Credit Card, or Interkassa payment gateways. You can selectively enable or disable payment gateways and allow your users to choose their preferred payment method.
When you choose a payment method, you will notice a new tab under the settings to configure that particular payment gateway. Each payment gateway has different settings which you will need to configure by logging into your account on that gateway and getting your API keys.
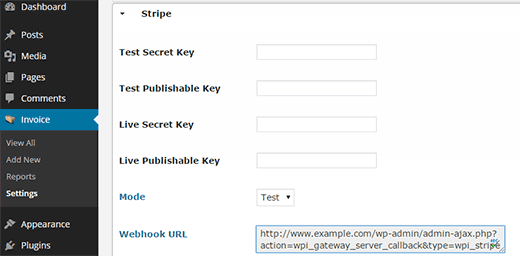
After configuring your payment gateways, click on Save All Settings button to store your changes.
Creating a New Invoice
To create and send a new invoice to a client, simply go to Invoices » Add New. You will be asked to provide client’s email address.
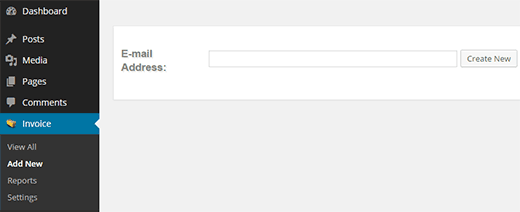
After entering the email address, the plugin will load the Invoice Editor screen. You will notice different meta boxes on the edit screen along with the familiar Title and Post Editor boxes. Just below the post editor box, you will notice a metabox to add the items you are including in this invoice.
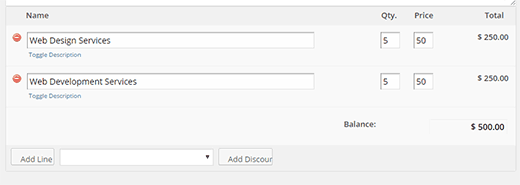
Simply enter an item, quantity and price. The plugin will calculate the total amount and will display it as balance. You can click on the toggle description link to add description for an item in the list. You can also click on the ‘Add Discount’ button to deduct discounted amount based on percentage or a fixed amount.
Below the invoice items box, you will notice the payments gateway box. This will be showing your default payment and all the payment methods you have enabled on your site. You can change these settings for an invoice if you want, or you can leave it to use the default options you set in the plugin settings.
On your right hand, you will see the user information metabox. It will be showing the client’s email address. You can fill in rest of the information. In case you don’t have all the information, you can leave it blank and the client can fill it in when making the payment.
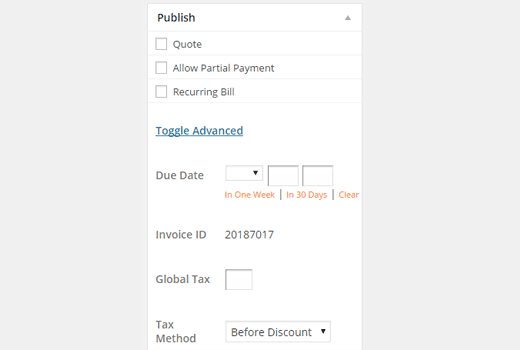
In the publish metabox, there are options to publish this invoice as a quote, allow partial payments, or make it a recurring bill. Clicking on the Toggle Advance link will allow you to add a due date for the invoice and enter tax information.
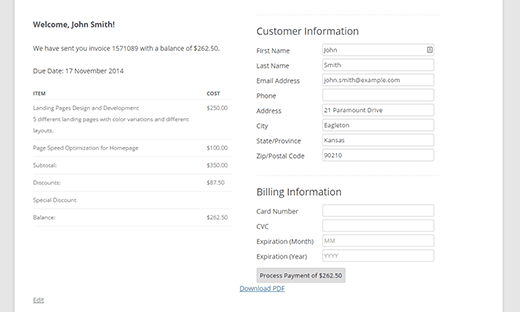
After publishing the invoice, your clients will receive an email notification with a link to the invoice page on your WordPress site. If your clients are not getting email notifications, then you should take a look at our guide on how to fix WordPress not sending email issue. The will see the invoice, with a link to print out the PDF version before making the payment. Clients can also change their personal information on the page.
Viewing Invoices and Reports
All the invoices you create can be accessed from Invoices » View All. You can sort and filter your invoices using the menu on your right hand side.
To get a bird’s eye view of your earnings and invoices, you need to visit Invoices » Reports. There you will be able to see graphs and charts for all invoices.
Fine Tuning Your Invoices, Emails, and Payments
The settings page for invoices will change after you save your initial settings. Now if you visit Invoices » Settings, you will be able to see many other options that you can configure. For example, you can tweak the email templates, create multiple templates, add line items which allows you to quickly add items into an invoice. You can even import/export your invoice data into XML file.

Pros and Cons of WP-Invoice and Freshbooks
Using WP-Invoice, you get a free plugin that fits right into your website. You don’t need to rely on a third party service to manage your clients and payments. You can setup automatic WordPress backups on a cloud storage to make sure that your data is safe.
On the other hand, FreshBooks is used by thousands of professionals. Your data is stored on the cloud, and you don’t need to worry about backup or security. More importantly it is not just an invoicing software, it is a full-fledged accounting solution for non-accountants. You can track expenses, connect bank accounts, receive online payments, etc. Apart from that, each day FreshBooks is connecting to more services and becoming more powerful and easier to use.
That’s all, we hope this article helped you create invoices for clients using WordPress.
